


Today is a guest post featuring a dude who is diving head first into backyard gardening. Please follow Brodin on twitter, and reach out to him if you need help or advice.
Share this post with anyone who might be interested in Urban Gardening.
Don’t forget to see what’s available in the Farmer’s Market.
Welcome anon,
One of the greatest perceived barriers to gardening is space. Now, after having produced enough for my household of 2 with more than we can eat using our 20sqft backyard, a singular grow light in the garage, and lots of Jungle duct tape, I feel more than confident in teaching you how it is all possible. Whether you feel confident growing produce from seed or have never managed to keep a plant alive, I hope you will be able to glean some knowledge from this.


Getting Started
The most important thing in starting your garden is understanding your climate and weather cycles. These things will limit your growing season, alter which crops will and will not thrive, and can be the deciding factor in your overall success. For tips on what grows when and where Farmer has a stack post all about it here and another here.
Once you’ve read up on your area, understood what grows well there, and have chosen out of those things foods you would like to produce, we are ready to proceed. If you are having a difficult time coming up with precisely which fruits/veggies you want to grow, keep reading as I will have suggestions along with advice in accordance with the produce I chose further along. That said, one thing that you can do is grow using partial scraps of food you already have to grow completely new plants. The easiest veggies for this in my opinion are carrots, celery, garlic, onions, and bok choy. The advantage here being, aside from the bok choy, these crops really do not take all that much space and are great for intercropping.
Intercropping
When dealing with limited space, intercropping is an absolute necessity. But what is it? Intercropping is a multiple cropping system that allows you to grow different crops in close proximity to one another. For example, onions have thin stems that can grow extremely tall. That means they do not necessarily need as much free space as tomatoes or squashes, which rely heavily on their leaves. The same goes for garlic, carrots, and celery. When dealing with limited space, it is all about ways to make the plants work for you while also ensuring they get the nutrients they need. Building a lattice fence for cucumbers, pumpkins, squash, and beans to climb up and around can add an extra dimension to the square yard, increasing space by quite a lot depending on how much fencing you have. Another option is to create arches within the space that the same crops could climb up and over, though this can be pricey and difficult to do without hands-on experience.
On a deeper level, when using containers to grow (limited space it’s a must) you can group together crops that appreciate similar soil pH. For example, blueberries prefer acidic soil and most crops do not. So, do we dedicate a spot to the blueberries for their godlike nutrients(IYKYK) or do you drop it and go elsewhere? Simple, grow it in a container. If on a budget, black bin at Costco will run you $7 and you will be able to keep your blueberries in it along with just about any herb (barring cilantro/coriander) or even a grass like lemon grass. Dill, parsley, thyme, and basil can all be grown with blueberries and will only take up a 2x2x4ft box in your garage. Along those lines, I would suggest always having something sprouting in the garage near the container(s).

Containers
When it comes to container growing there really isn’t all that much to it. While it does require a bit more attention because crops can drown more easily and become nutrient deficient quickly if neglected, the advantages far outweigh this minor inconvenience.
So which crops would be the best to start with in your containers? Personally my preferences are as follows: herbs, berries, potatoes. Just those three at the moment, but those three have been incredible and are simple to recreate.
Some people say plant the whole potato, some say half, I say so long as it has three eyes you should be more than pleased with the results. The rule of thumb for potatoes, in my experience, is that you can plant any chunk of potato so long as it has 3 eyes.
It is important, however, to ensure there is only one sprout actively coming from the potato at the time it is planted. Extra sprouts will result in more potatoes, but they will likely be smaller. If in a hot location, ensure sunlight, but be mindful not to fry the roots. In the ground there is a lot more room for thermal distribution than in a black container of any size.
My rule of thumb is the first 6-8 hours of sunlight is the best then take them inside when the late afternoon/evening sun gets hyper intense. Potatoes are ridiculously hands off, otherwise. Basically just keep the soil wet and don’t let them bake subterra while in the container and you’ve got it.
Once the plant has grown heartily and the stalks begin to sag and die off you are all set, now comes the biggest advantage to container planting potatoes, and the reason why I will probably do it even after we have land, is once they are done all you have to do is dump the container out and sort through soil for your potatoes! No digging, no risking the murder of a fresh potato because you couldn’t see it as you were harvesting, just simply sorting through soil and potatoes.
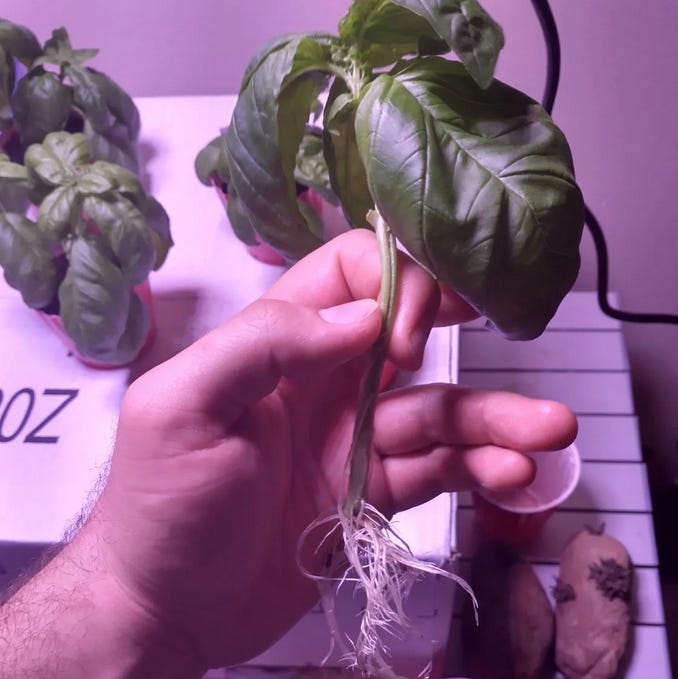
Herbs can stay in containers without ever necessarily having to leave the garage/room they are being kept in. In fact, there are even setups to keep a healthy herb garden alive on your countertop, if you have the space. I do not. So, I grow my herbs in buckets. Basil is nearly impossible to drown, so you can water heavily and watch as it slowly takes it in or water daily in smaller amounts. It also LOVES to be cut/trimmed.
As basil shoots out and has to put more energy into growing taller, there is less energy available for the formation of more leaves. Trimming the basil often will allow it to grow more like a bush than a stalk and will provide you with tons of fresh basil to be used week in and week out. Basil is also extremely simple to propagate which I will demonstrate later. At the end of the day, not growing herbs, potatoes, or berries in your garage is preventing you from adding some of the easiest and most delicious elements to your home cooking.
Propagation
What level you start at with this will completely depend on your comfort level, token flow, experience, and desired outcomes. Personally, I like to do a mixture of propagation methods simply because I find that everything works in its own unique way, but that is because I have extra time on my hands. With that said, I will still explain which crops I do which ways and why so that you can choose whichever you think might be best for you.
First, the OG, from seed. There are many ways to grow plants from seed and they all work, this step primarily requires patience. I don’t want to get too much into this because it is something Farmer certainly knows more about and you can see that here. That said, if you decide to grow from seed, here are a few tricks on how to do it with limited space.
Red solo cups. Might sound weird, but they have proven to be extremely useful for me. Can you go buy individual starting cups from Lowes that are specifically for gardening? You absolutely can, but we are urban gardening so pick up that bag of 200 cups for $10 and get started! This works particularly well for tomatoes.
If you have ever looked closely at a tomato plant, you have probably noticed the little hairs growing everywhere on its stem. If you bury the stem, those little hairs will turn into roots. The result of this is a stronger, sturdier stalk that will be able to support all of the giant tomatoes you are growing. Red solo cups are good in this regard due to their size. So, what are the step by step instructions?
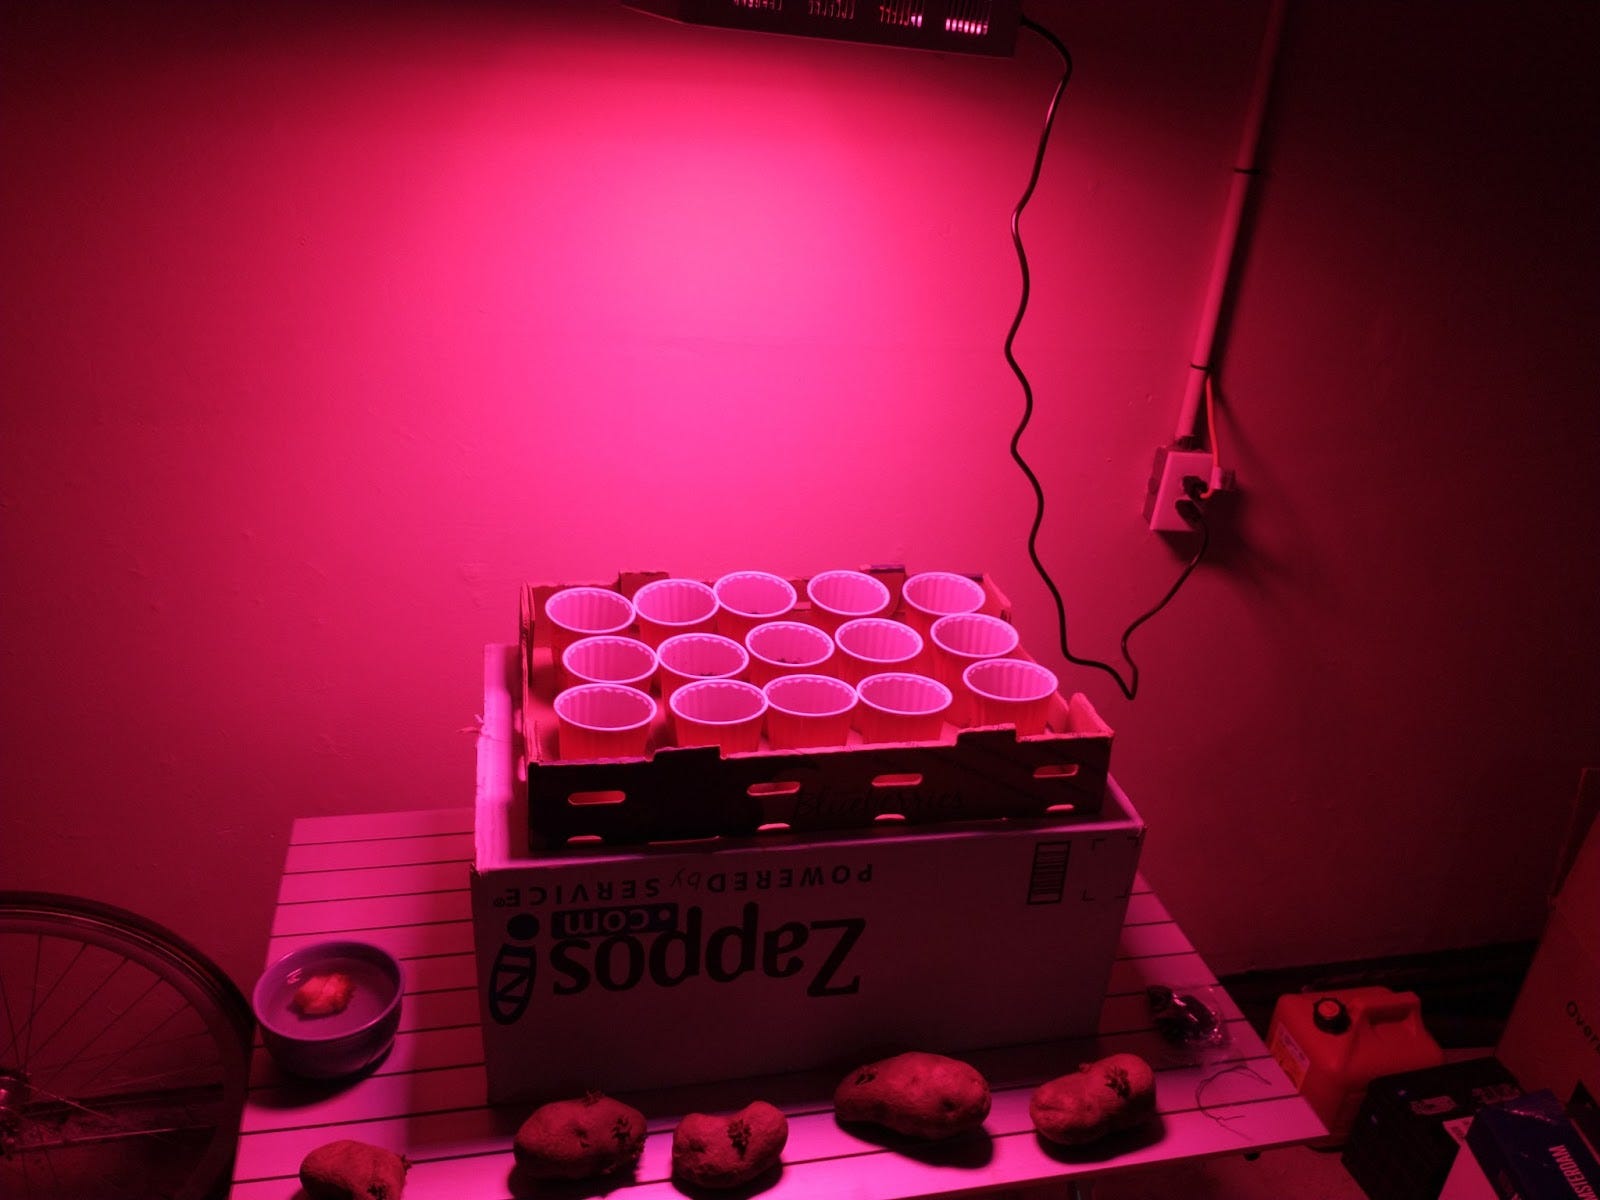
Buy red solo cups and a grow light
Poke holes in the bottom of the cup (I use a nail and poke 4-5 holes around the bottom)
Add 2”of soil (I use MiracleGro)
Add 1 Tomato seed
Add 2” more soil
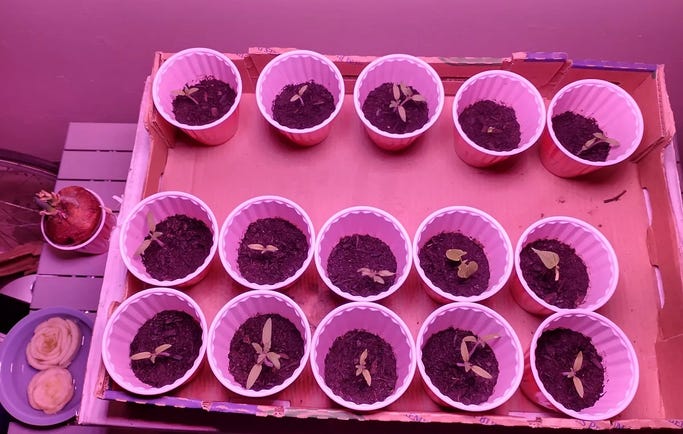
Pat down gently. It is important for the soil to be firm enough for tomato seed to not be jarred from place when watering, but not so firm that it cannot shoot out a stalk or roots. Don’t overthink this, it’s not actually that difficult, and if you do it 30 times you’re bound to at least get a couple right!
Watering - for this I usually add enough to get the soil moist. Until the plant begins to grow I would suggest simply ensuring the soil is moist. In other words, just don’t be adding so much water it is constantly draining out of the bottom or so little that it looks like SoCal in the middle of July.
Hang grow light over however many cups you chose to begin with (depending on size up to 50)
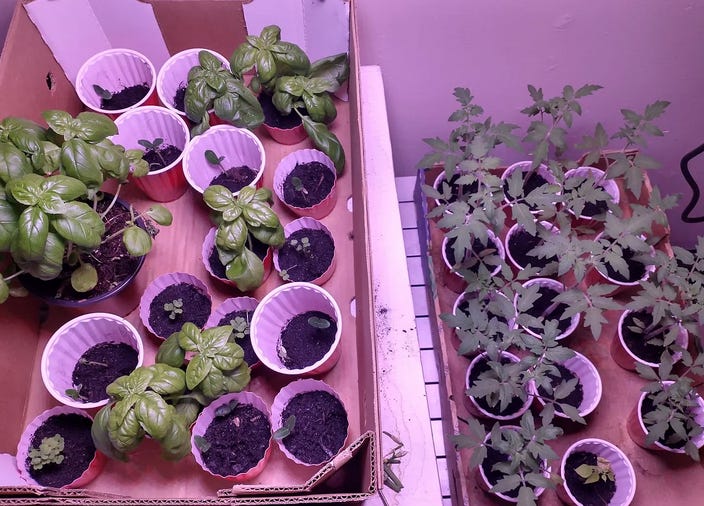
Every time your tomato plant grows a couple inches, bury the stem and pack down the soil gently. You can do this until there is soil nearly to the top of the cup then transplanting is easy
Now we break out of the garage and into the outside world (or into a container)
*All of these steps EXCEPT burying the stem can be done with any seed that you would like to get started. However, for cucumber seeds I recommend placing them in a damp paper towel and placing the paper towel in a plastic bag under the grow light here is what that ends up looking like
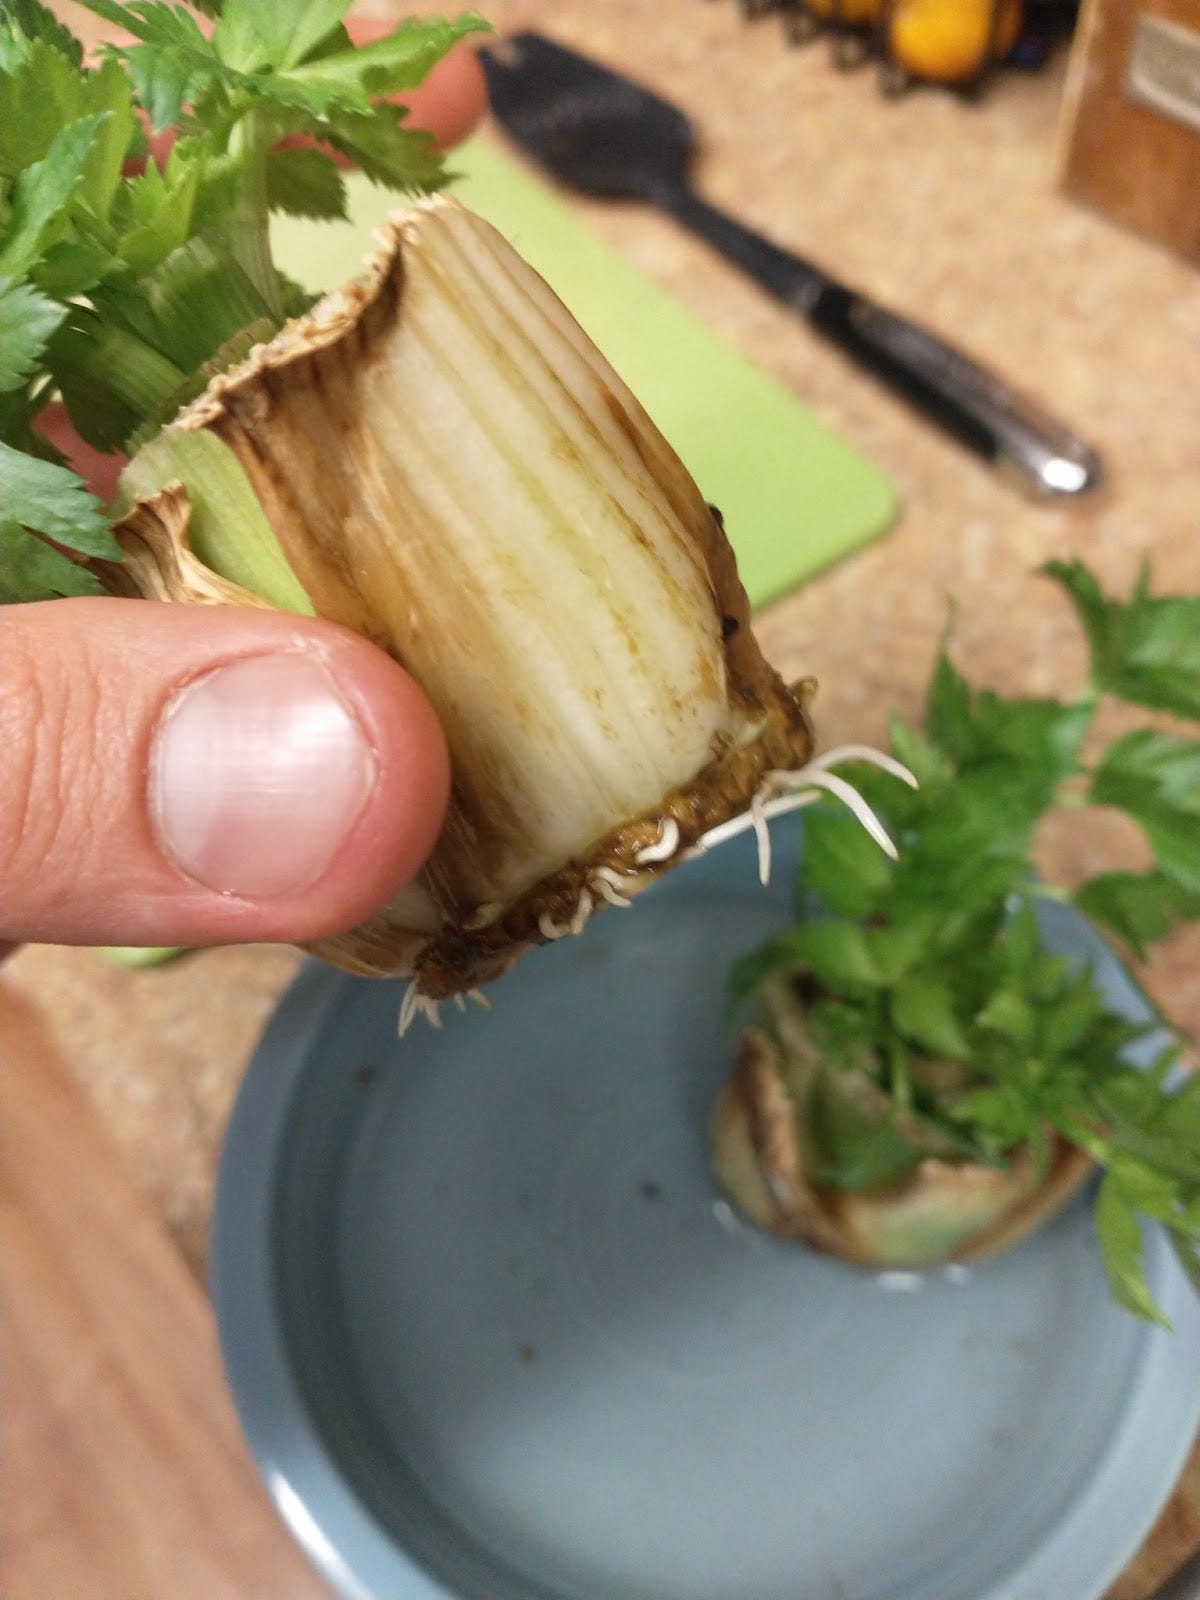
Now, if you don’t want to begin with the red solo cup seed method, you can grow produce straight from the scraps of vegetables you bought and used anyway. How is that possible? Well, many vegetables have roots that can be revived, or rehydrated, and become active again.
The little hairs hanging from your onions and your garlic are actually roots. If you were to place them in water and expose them to the sun they would begin to grow, again. I saw this about a year ago and I didn’t know if I believed it, so I tried it. I am happy to report that it is absolutely possible and works better than I could have ever imagined.
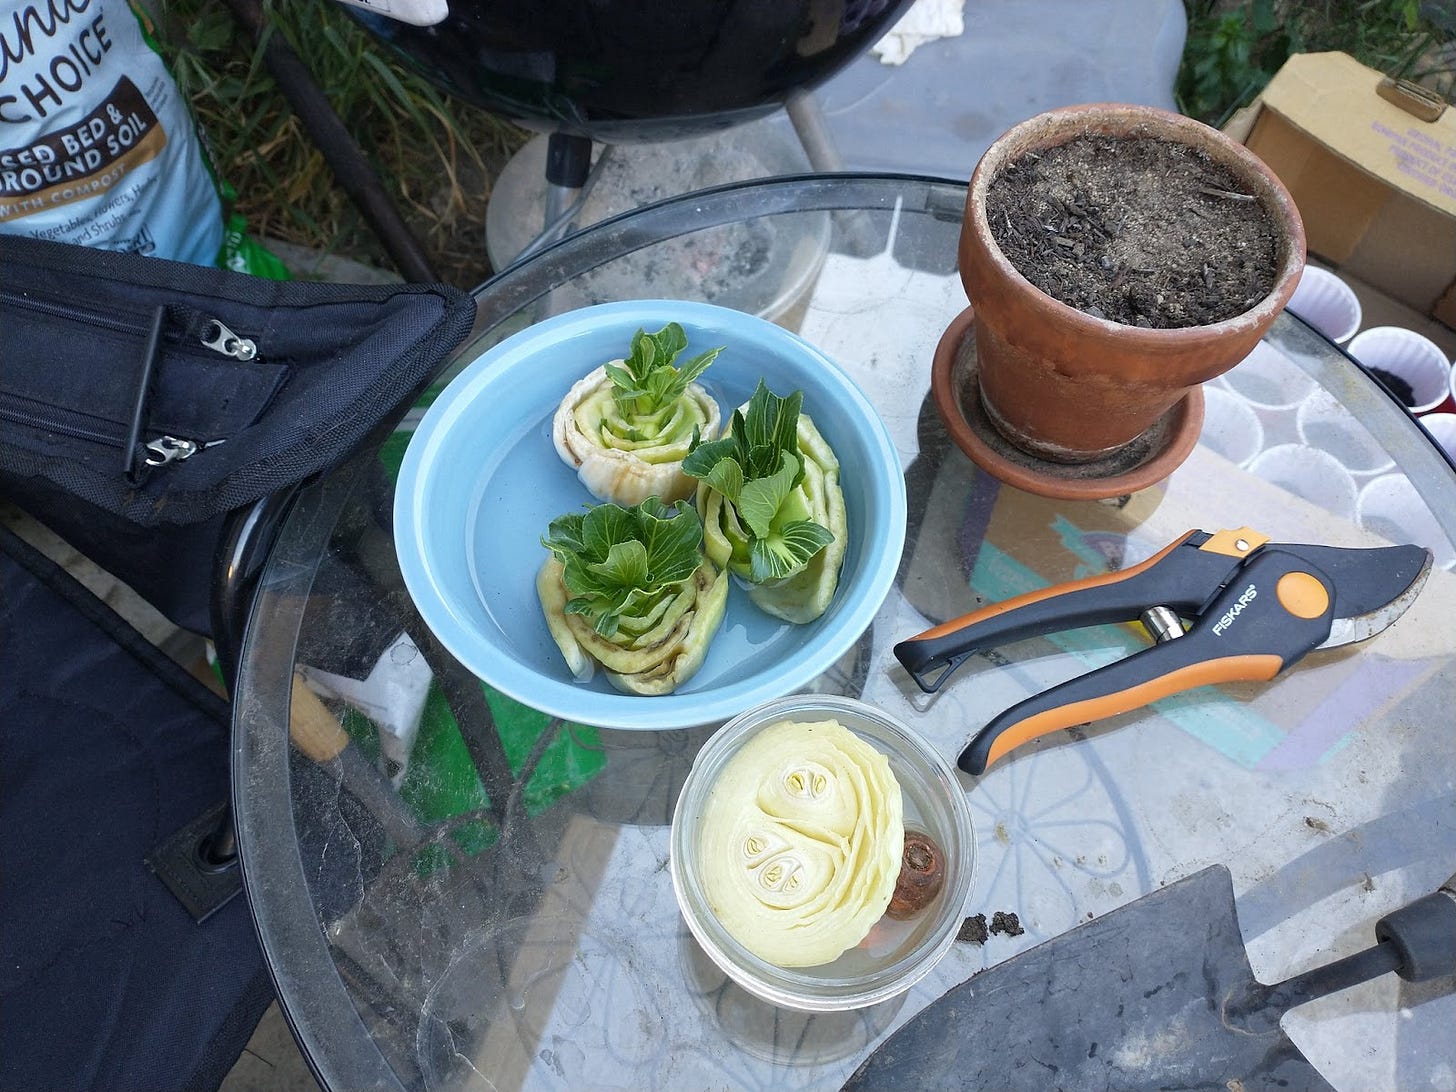
From store scraps, I have grown onions, garlic, potatoes, bok choy, celery, and carrots. Not only that, but I was able to allow a portion of each crop to flower, collect the seeds, and now I am ready for next year’s crops without ever having to buy seeds for these specific things. Here’s how I did it:
Choose which you want to use
Potatoes, carrots, celery, bok choy, onions, and ginger are things I have had success with, but if there is something you are curious about after reading this I encourage you to look into whether or not it would work, or reach out and I will let you know
Pay attention when you cut them during food prep. You want to leave more than you normally would, 2-3” of a carrot, piece of ginger, potato, or bok choy is about perfect and 1-2” for celery and onions
Set it aside in some water


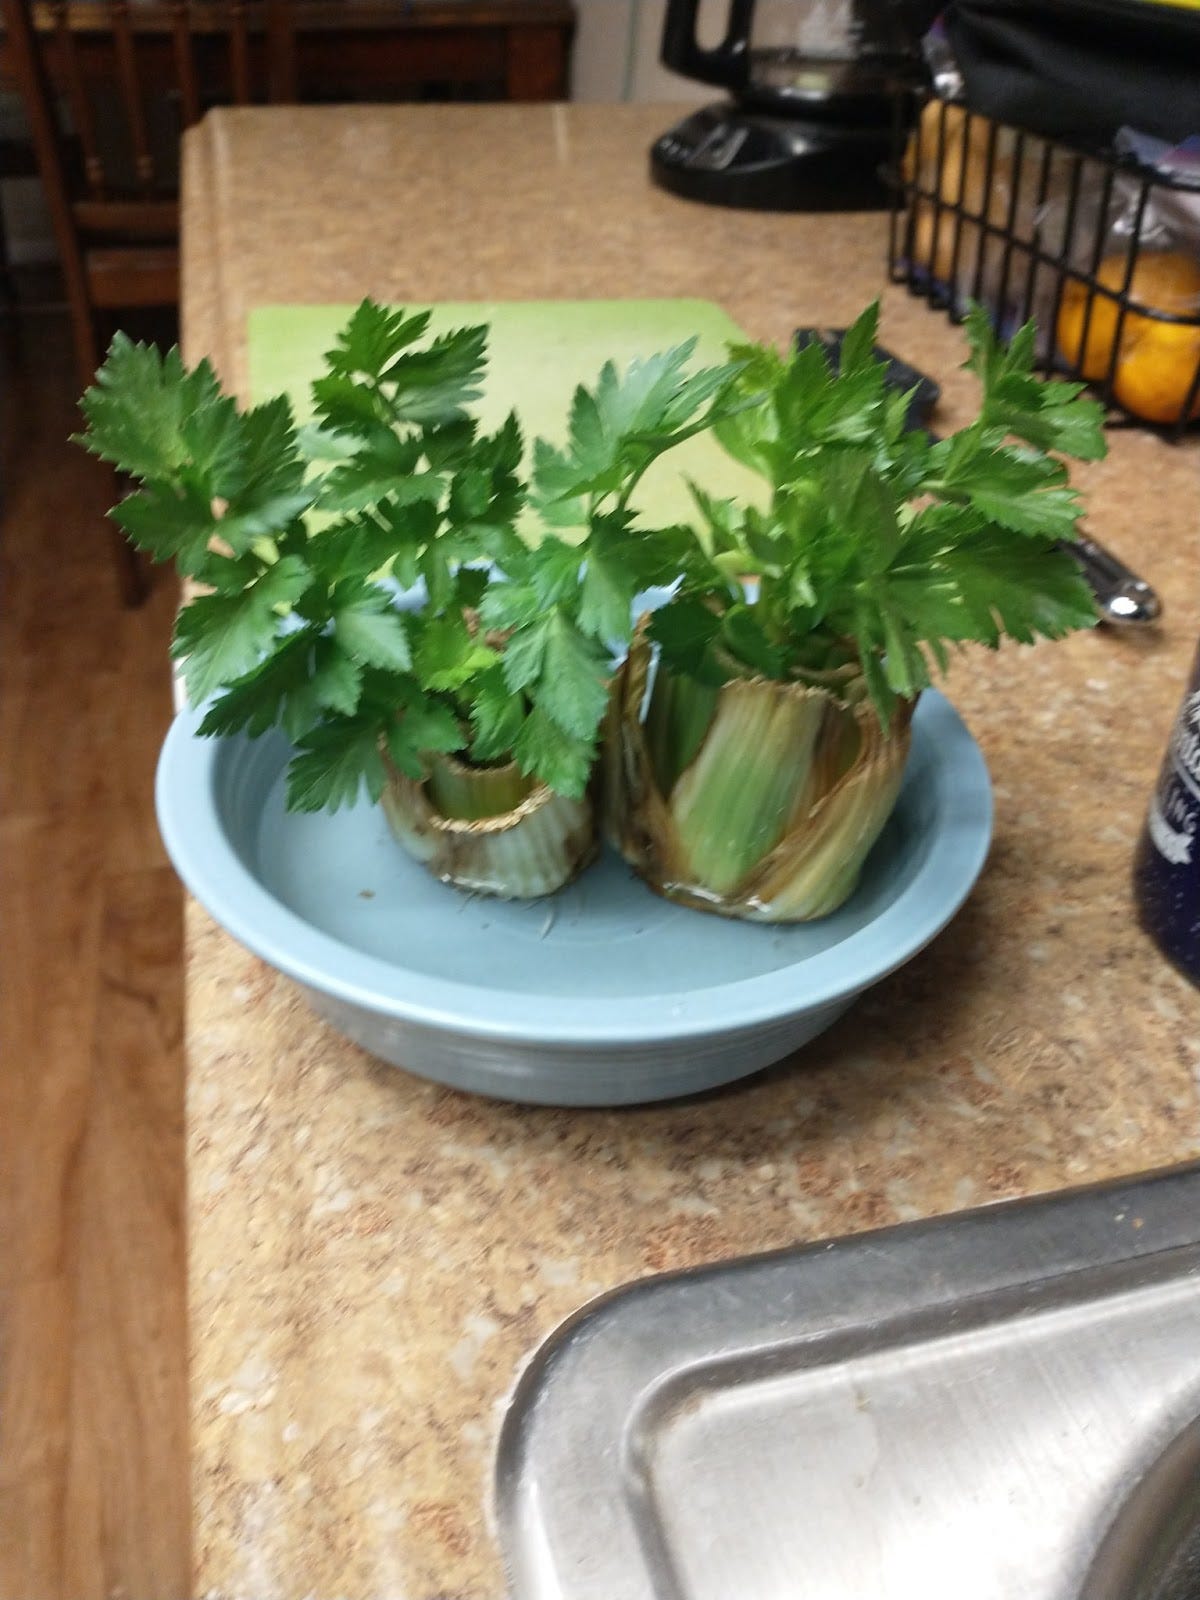
Make sure it gets 6-8 hours of sunlights or is under the grow light with your other things - but be conscious of the temperature as you don’t want the water to get super hot
Wait and watch as the magic happens - the roots should grow longer and healthier over 3-4 weeks
Now we break out of the garage and into the outside world (or into a container)


Moving Outdoors
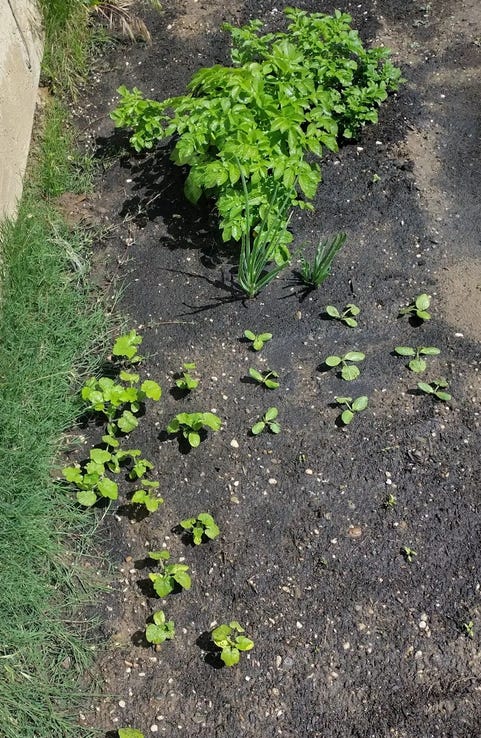
Now that we have living, breathing plants in our possession, it is time to plan the layout. This is where intercropping becomes very important. For simplicity’s sake, I will just explain what I have had success with, the things I think I did well, and the mistakes I made that you should avoid.
First of all, understand that squashes will not stay where you put them. Like cucumbers, squashes and pumpkins are viney and will crawl all across the garden back and forth if you let them. It is for this reason we put lattice fences against the walls for them to grow up, rather than crawl around on the ground.
Yes, you will have to guide them, but it will save you lots of time and energy in the long run. With that, squashes have large leaves to capture the most sun possible, that means they will shade out anything you plant with them. Does that mean you can’t plant anything with them? No, but you need to choose well. My personal suggestions are onions and garlic as neither require much vertical space or sunlight.
At the Brodin household we put our squash against the house walls so that we can lean our lattice fences against it and give ample space and support to the plant. We plant onions and garlic with them and have seen great success with both.
Next, the tomatoes and other seedlings we had in the garage. The best part about solo cups is they are reusable and extremely simple to get a seedling out of when the time is right. After finding a large space (3ftx3ft) plant one tomato plant as deep as you can while still allowing ample leaves for photosynthesis. In this 3x3 box you should be able to fit 9 plants. One in each corner, one in between all of them, and one in the center.
Will it be a little tight? Yes, but so long as you are attentive there shouldn’t be any issues. In my compost pile this year I accidentally grew an 8ft tomato bush. I didn’t even realize how large it was until I started building a fence to hold it up, so they will grow provided ample nutrients and water.
Once these are in you can begin with your intercropping plan, I suggest beans for this, though I would also suggest planting them anywhere your lattice fence meets the ground. For tomatoes in particular, they love fertilizer and will throw a fit when they get nutrient deficient. My advice for this, as with all plants, is don’t give up. A plant will look dead long before it is actually at risk of dying, they are just being dramatic.
If you are growing outside, pay attention to what crops like full sun and which crops do not, following the instructions on a seed pack is usually not great, they just say everything wants full sun which is not true. If you live in a hotter climate, I would not grow leafy greens outside.
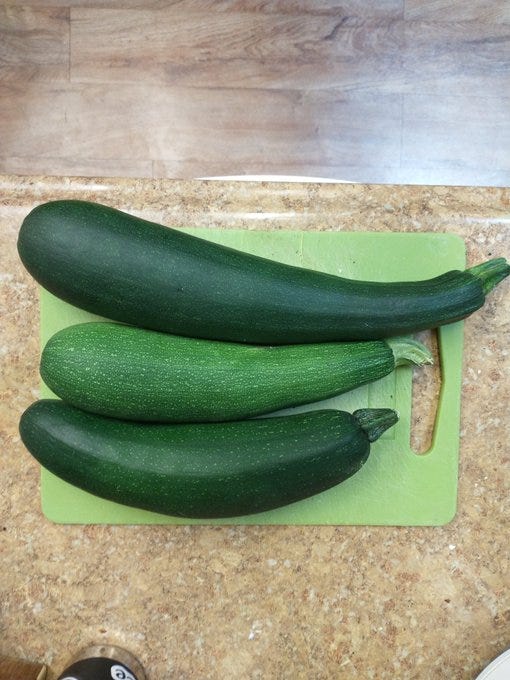
I am currently building my hydroponics rig and will write a stack about that when it is completed, but for now just know that leafy greens thrive in the shade and cooler temperatures. I will say, I have had great success growing chard beneath the zucchini leaves.
In my experience tomatoes, squashes, potatoes, onions, broccoli, and garlic can all handle hot temperatures for extended periods of time as long as they are being watered consistently. Cucumbers and celery, on the other hand, are not big fans.
Say you want to grow in containers, though, because you have garage space, but no yard space. Fair enough, even with our tiny backyard I find it valuable to have the garage as well. We only have one grow light as of right now, but there are plans to purchase some more in the near future after having seen the success we have.
The most important thing with containers is nutrient regulation. Due to the fact that the nutrients available in the soil within the container are all that will be there barring introduction of additional nutrients, it is vital that you remember to continue adding fertilizer or plant food so that your plants are able to grow big and healthy and produce ample fruit for your labor. Hand in hand with the nutrients is the water.
Watering in a container, particularly one without holes, is something that must be done carefully so that plants are not drowned. Once the soil is damp it is likely enough, though there are plants that are less sensitive and ones that thrive with more water, like basil. Still, while you are learning I would suggest only watering to the point where the soil is damp, you will notice if the plants look like they need more water and can adjust accordingly, it can be more difficult to recognize when a plant is strained due to excess water as opposed to insufficient water.
Things I’ve noticed work well in containers are herbs, berries, potatoes, garlic, onions, and basil. Right now we are trying bok choy grown from the seeds we harvested as mentioned earlier, leafy greens in our hydroponic system, and more herbs to add some variety to the fresh herbs we use in our cooking. After we’ve run the experiment I will report back on the successes and failures we’ve seen.
Failures
Now for all the things not to do. In any new venture you are bound to fail in some regard. With gardening, it is imperative that you do not become discouraged. One of the reasons I suggest red solo cups in the first place is that they are so cheap and abundant.
If you try to start 50 seedlings, you are bound to get at least a few to go, and out of those maybe you only get one plant, but hey it’s your first plant and now you are ready to grow some more! So what did I do wrong that you needn’t do? It is always better to learn from the mistakes of others when possible.
The sun is hot. If you put anything into a container, remember that it would normally only be receiving heat from one direction, but in a container the walls are also affected by the sun sending heat in from multiple directions which can put far too much strain on a plant, especially one that is new. Limit outdoor sun time for container plants to the cooler times of the day and avoid peak heat.
I mentioned this before, but it is worth mentioning again. Squashes will go WILD. It can be hard to cut back your plants, especially as a new gardener, but it is absolutely necessary or you will end up with a pumpkin in your broccoli. Use the fence tip, but don’t hesitate to cut back the vines of a squash, the energy will be diverted and put elsewhere, you are not sacrificing any of the growth by trimming it back
Basil, onions, broccoli, carrots, and potatoes LOVE to be trimmed. If a plant has x amount of energy in a day and is putting y amount of energy into new growth, but new growth can either be manifested in L-leaves or f-fruit, trimming back the leaves allows the energy to be diverted into other areas. That said, be judicious when trimming. You never want to trim more than 30% of the foliage, personally I never do more than 20%.
Do not pull early. It can be so tempting to harvest early, but you really want to make sure you wait until things are fully ripe. That said, once they are ripe, harvest away! Pulling off already ripened fruit will free up resources the plant can put towards growing more fruit.
Control for bugs early and often. Aphids are the bane of my existence and I honestly can and probably will write a post specifically on aphids and all the problems that they cause. However, what is important for you to know is that no crop is immune from pests and it is best to be on the lookout so you can put an end to it before things get out of hand. Personally, I have found the most luck in just removing infected crops and protecting uninfected crops. However, it can be painful to tear up the garden, so other things to try, that I have tried and had limited success with are, ladybugs(they sell them at the store), neem oil,
Do NOT wait. If you plant your crops today, weather/climate permitting, you MIGHT see a return in 3-4 months. Putting it off is something that I wish I hadn’t done as I would have had two crops through by now instead of just seeing the fruits of my first. With everything I’ve left in here, the total cost shouldn’t be more than $200 UST, unless you grab extras to make things easier/speed things up.
Conclusion
If you are here, I assume you have read and followed the BtB. Therefore I won’t spend much time explaining why having the ability to grow food for you and your family is important. If you feel you need an explanation read pinned tweet or NGMI.
My goal was to show you that you don’t need acres upon acres of land to provide sustenance for your family. All you need is a room, a grow light, some red solo cups, and the same produce you planned on buying and consuming anyway.
Obviously there are layers to this and more space does help, but you should never let that limit you. I’ve seen great success and I hope you will, too.
This free post was brought to you by my sponsors:
Hoss Tools - Seeds and Gardening Equipment
High Mowing Organic Seeds - Organic Seeds and More
Share A Sale - Become an Affiliate Marketer