


Build Your Own Fence Guide -5
Selecting and Purchasing Fencing Materials and Tools

Selecting and Purchasing Fencing Materials and Tools
It’s time to talk about wire fence materials and tools. Building fence is costly and labor consuming, so you want to use quality material to last a long time. Having the right tools will make your job easier. Most of these tools are needed for other general home/farm work, buying quality tools is a no-brainer.
Let’s get to work.
Wire Fence Materials
There are several different manufacturers making wire sheep/goat/cow fence. There are also different materials and methods these manufacturers use for making these items.
Be careful going with the cheapest option on materials. Cheaper fencing materials are usually cheaper for a reason.
You want to select woven wire fencing built with galvanized wire. Wire size at least 12.5 gauge for the middle “filler strands” and 10 gauge wire for the top and bottom strands.
You also want to be careful with fencing that is welded together. This could be a weak point, the better brands offer strands that are joined with a knot. This allows for more flexibility and will not break easily.
I’ve always used Red Brand fencing because it is good quality material and easily found at the stores around here. I’ve recently discovered another brand of wire fence called Bakeart. I’m impressed with the quality of their fencing materials as well, but I have no personal experience with this brand. Do your own research and find a good quality fence brand that is carried in your area.
You’ve probably noticed, I’ve pivoted my focus toward goat fence building in this guide over the last few weeks, this is because wooden ranch style fence is pretty straightforward. Barbed wire and high tensile electric still require the wooden brace post assemblies, and are based on the same overall design.
We’ll cover goat fencing now and come back at the end to cover barbed wire and high tensile.
Goat fencing is typically referring to metal wire fence with 4” squares. The reason for this is because the 4” squares make it hard for a goat to get their head caught in it.
There is another type of fence called field fence with larger squares. This will work for goats, but goats with horns could get their heads caught in it. It’s slightly less expensive due to having less strands of metal wire.
There is another goat fence referred to as “no step” this has 4” x 2” squares in it and lessens the ability for a goat to step up onto the fence. They probably still can, but it’s a little harder for them. This type of fence is the most expensive of the three due to the added number of metal strands.
4” square goat fence and field fence both allow for a goat to step right on the strands of the fence and hang their head over the fence. This will make the fence sag over time. The only way to stop this is to run a strand of electric wire along the inside perimeter of your goat fencing about 2 feet off of the ground. It’s up to you to decide which type of fence you would like to install.
Field fence is the easiest because it has less horizontal strands to cut and wrap at the terminations.
Fence Termination Methods
Terminations are required at every corner and gate. It’s where the wire fence is cut and wrapped/secured around the wooden posts.
There are a few ways to attach the fence around the brace posts at the fence terminations. The terminations are the areas that require the most time and labor during the wire fence installation phase.
We haven’t reached the fence installation phase in this guide yet, but I’m covering this area now since there are tools and materials required for the fence installation.
We’ll cover fence installation and terminations in detail later.
T-Clips
The first method of terminating fence is a one that I’ve only recently discovered using innovative clips that allow for much easier fence terminations. They are made by a company called Gripple, called “T Clips”, you can see their product here.
The Gripple Wire T-Clip 14-10G 10Ct, 288463 will work for just about any brand of goat fencing, because they work on 14-10 gauge wire. These clips greatly reduce time and effort on fence terminations. You can see a video here from Bekeart showing how the terminating T-clips work.

Buy Fresh Honey From This Year’s Harvest!
You’ve probably never had honey this fresh. It’s easy to order and shipped quickly right to your door, so simple! You can use promo code honey for 5% off, I appreciate your support.
Terminations Without Clips
Without the t-clips, you have to twist each strand back on itself to terminate the fence properly. This is time consuming and difficult can be difficult. This is how I’ve always done my fencing, but the next fence I build, I’ll try the t-clip method.
Here is the Red Brand goat fence installation video, which I’ve always followed. (the t-clips will work on red brand fence.)

Stapling Terminations
A third way I’ve seen used for fence terminations is to wrap the wire around the post and staple it to the post. I don’t like this method because when you put tension on the fence during installation it could create a twisting force on the post. This may cause brace problems in my opinion. It looks like this:

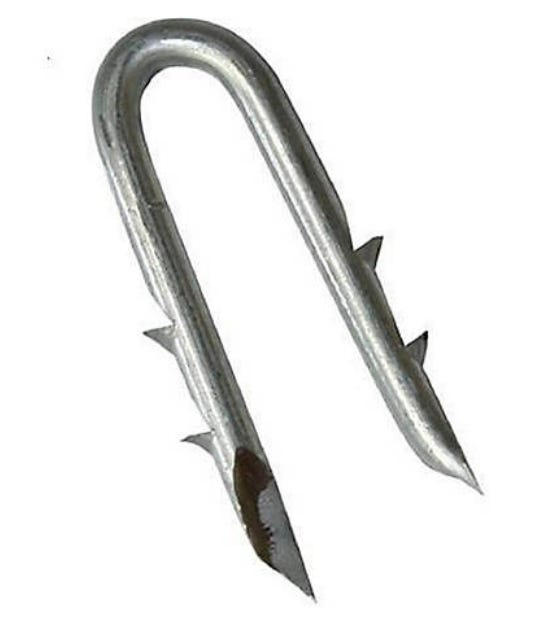
Staples
You also need staples to secure the fence to the wooden brace posts and the wooden line posts (even if you use the wire twisting or t-clip termination methods).
These are just U-shaped metal staples that are driven into the wooden posts with a hammer securing the fence to the post. Just make sure you get galvanized staples and at least 1.5” long.
You’ll need a lot of these since you are required to put a staple at every strand of the goat fence at every wooden post. You can buy them from amazon here.
Tools
You will need some tools to help you along the fence building journey. I’ve compiled a complete list of tools that you will need at some point in the process.
These are amazon affiliate links, thank you if you decide to use them.
Tools needed to place your posts:
Post Hole Diggers - digging post holes, this is not a bad way to dig holes honestly, it’s a great workout and allows for better accuracy when placing your posts.
Three Point Hitch Auger with 12” bit - If you have a tractor, and plan to build lots of fence, this is worth its weight in gold.
Hand Held Auger - you could try one of these, they seem like a lot of work to me.
Tamping Stick - used to tamp dirt and backfill in the post holes
4’ Level - used to level posts and braces
Tools needed later in the process:
Hammer - Driving staples, brace pins, and more
Tape Measure - Measuring brace posts and more
Wire Cutters (lineman’s pliers) - cutting the wire fence and twisting
Fence Twisting Tool - these make nice tight fence terminations (not needed if using gripple t-clips)
Torpedo Level - leveling t-posts
Battery Sawzall - Cutting brace posts, you can use a chainsaw, but I like sawzall for cleaner cuts
Sawzall Blades - for cutting the brace posts with a sawzall
Drill Bit - for drilling holes in the brace posts for the brace pins
Battery Drill - drilling holes in brace posts to install brace pins
Battery Driver - Installing screws to help install brace posts and securing fence puller (not required, but nice to have)
Tool Batteries - It’s nice to have 3 batteries for these three battery operated tools, (all of the links above were for “tool only”. You may want to buy one of the tools with a battery and then buy a two pack like this one)
Fence Plier Tool - helps to twist, cut, bend wire at terminations
Fence Clip Tool - For attaching the fence clips to the t-posts, it works like this:

As you can see, you need a lot of tools to build fences. Don’t be overwhelmed. Use what you have and can find used locally, (or borrow). Start buying tools once a month and acquire them as needed.
If you’re planning to be a homesteader, these tools are good to have around anyway, so make sure you’re buying quality tools.
That covers materials and tools. We’re ready to pull some fence.
WAGMI
Farmer